• About Me
  • Blog
  • Design Services
  • Shop
  • Portfolio
  • Contact
Menu

Revive & Design

Street Address
City, State, Zip
Phone Number

Your Custom Text Here

Revive & Design

  • About Me
  • Blog
  • Design Services
  • Shop
  • Portfolio
  • Contact

ONE ROOM CHALLENGE: WEEK 4 (BUILD SLIDER DOOR & SNEAK PEEK)

October 23, 2019 Lindsey Hanson
ORC WEEK 4.png

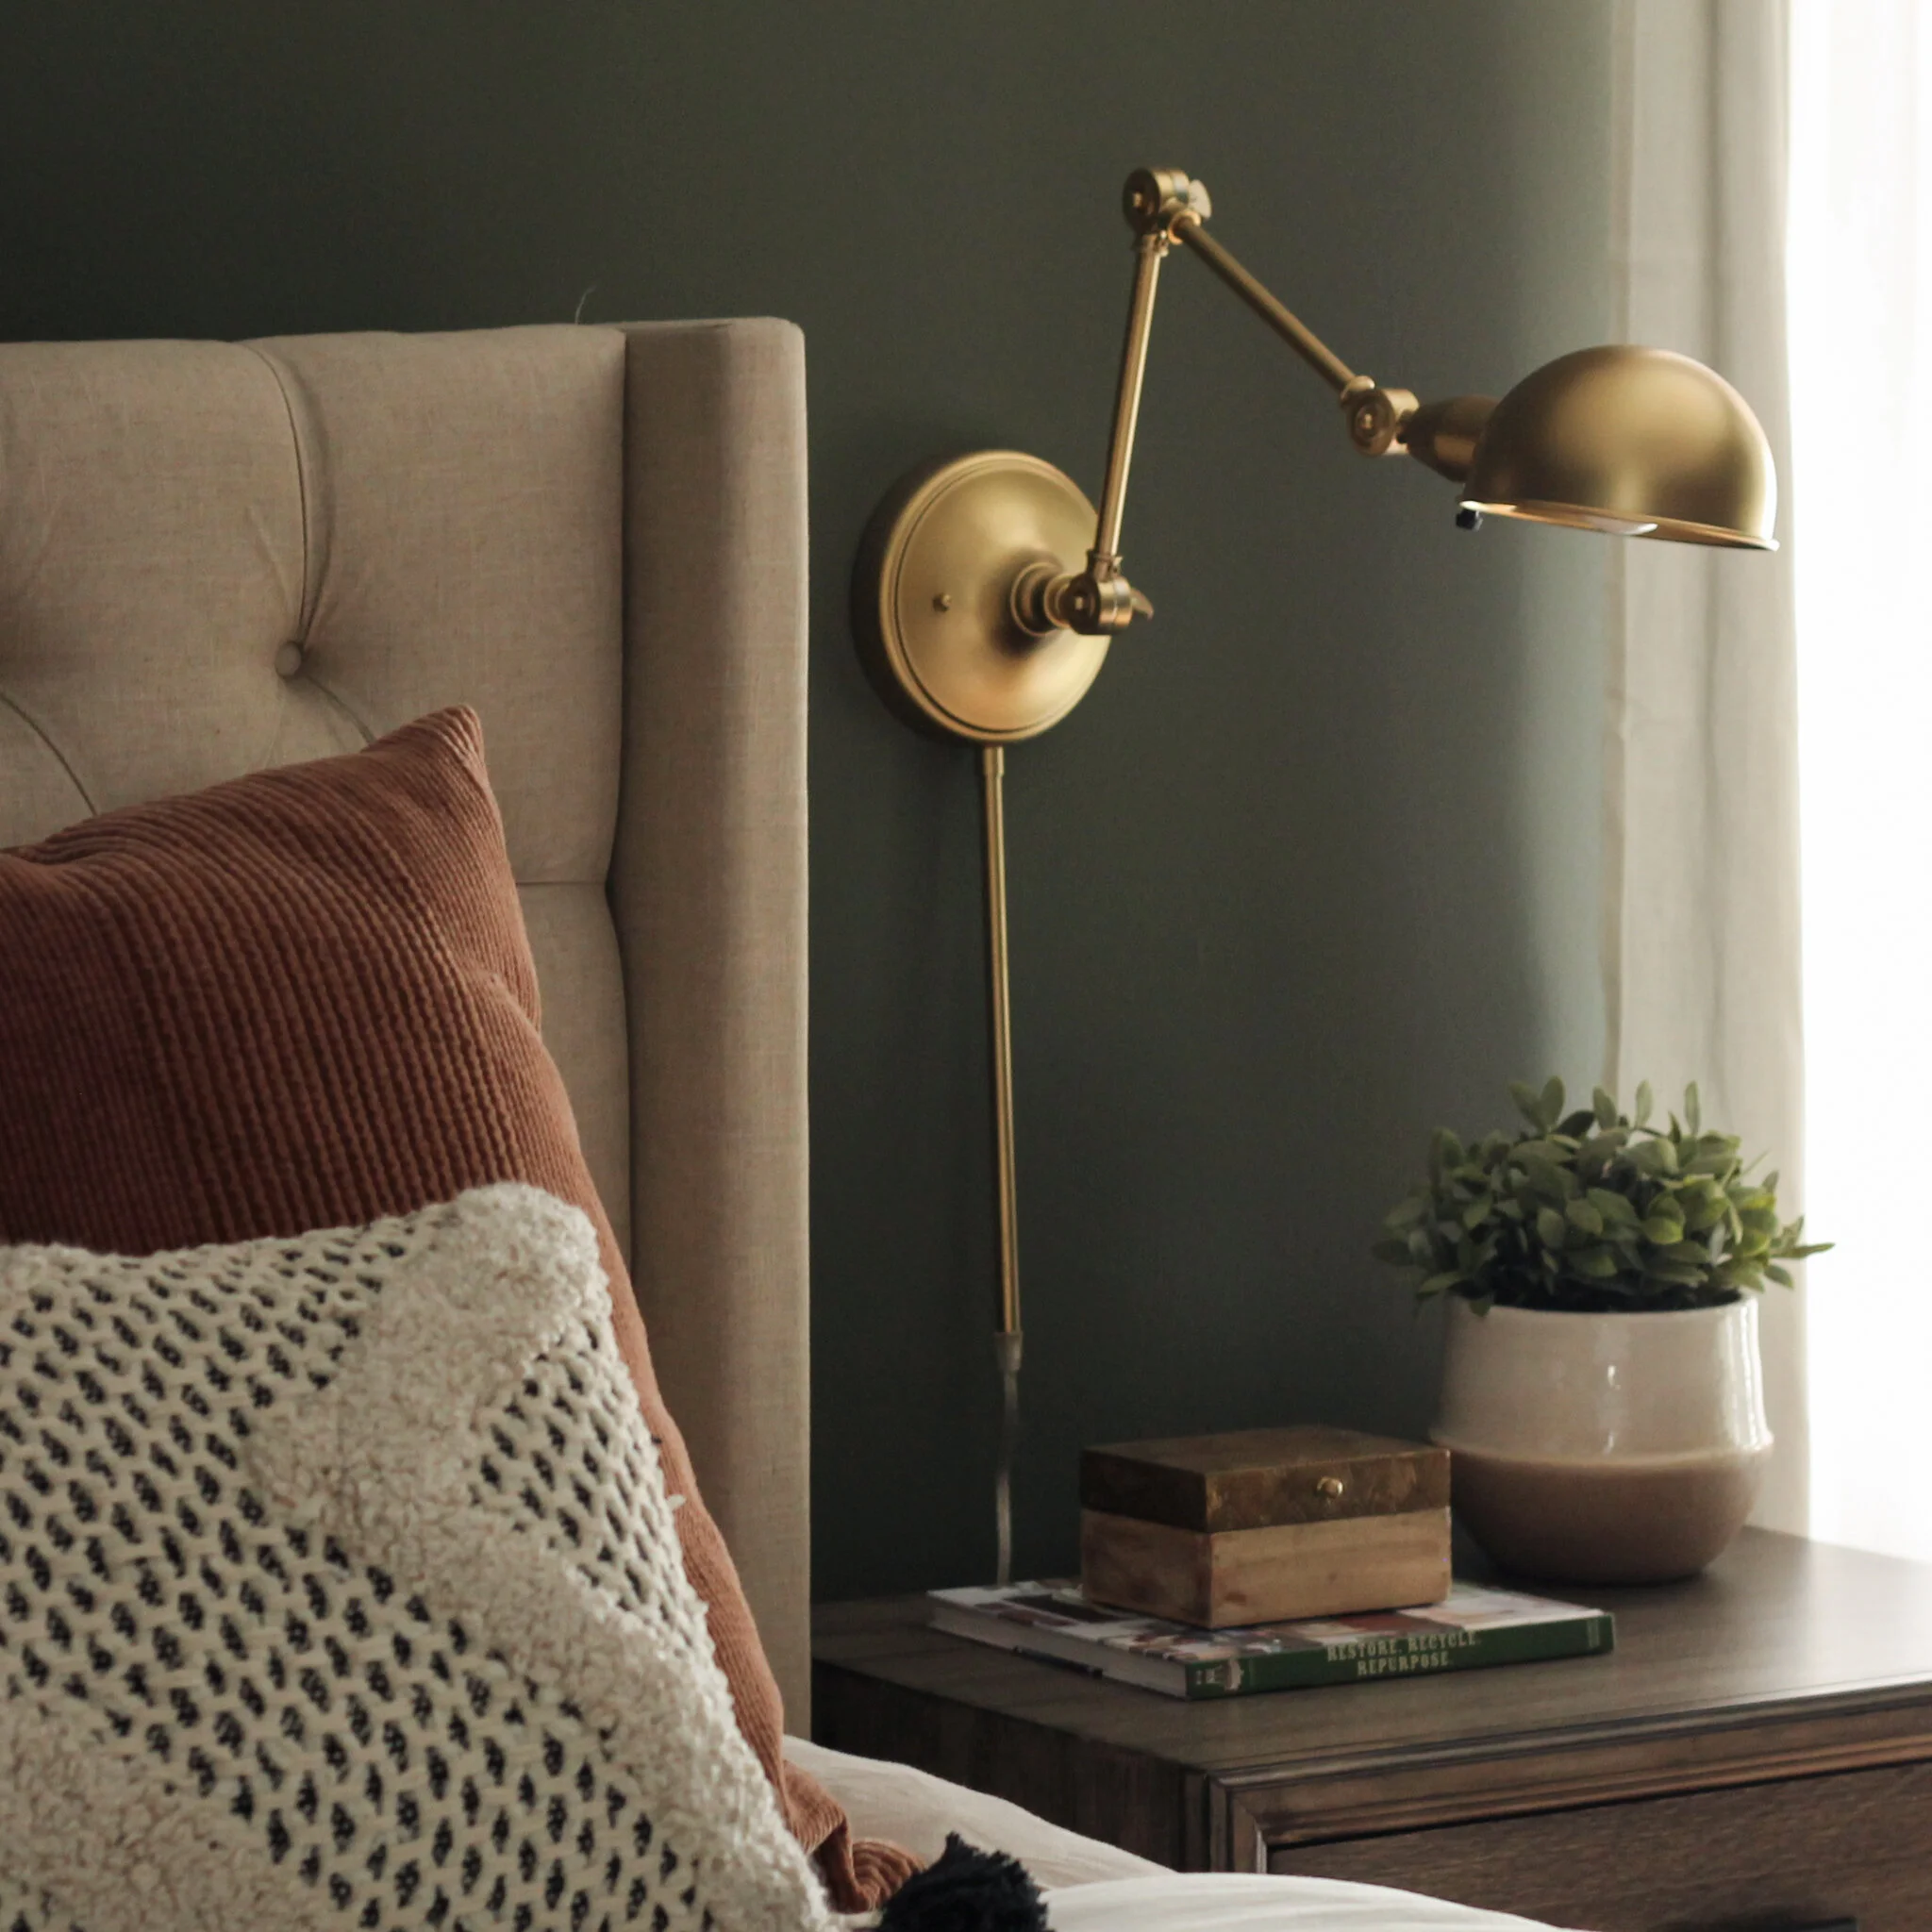
Wow, time flies when you’re having fun huh?! This ORC makeover is cruisin right along, I even managed to clean a section of the room to snap a photo to share with you all. We’re loving the moody green walls, the room feels so “adult” like (whatever that is suppose to mean, lol). If you checked in last week you saw that I spray painted our wall sconces gold. My sweet hubby hung those for me this week, and oh my goodness they are simply stunning!

IMG_9028.jpg

I went back and forth on the slider door design but ultimately settled on a simple paneled style. We wanted it to coordinate with our other doors but not try to match them. I think this timeless style will fit the bill.

Choose your style of door

We started with a 1/2” paintable plywood cut to the size of our opening. From there we used 1x6’s on the top, middle and bottom horizontal boards and 1x4’s in between and on the vertical side boards.

IMG_0991.JPG

Adhere your boards with wood glue

Once we made all our cuts and laid everything out to ensure it looked good, we used Liquid Nails to adhere the boards to the plywood. You’ll want to use clamps to make sure there are no gaps anywhere. They also help keep everything in place while you nail it together.

IMG_0992.JPG

attach boards with nail gun

You’ll want to use a nail gun for this job so that your nails sink into the wood. Also, make sure you’re using nails that are long enough to go through the trim and the plywood. We used 1” nails for this project.

IMG_0993.JPG

fill holes and seams with wood filler

After that you’ll want to fill all your nail holes and seams with a wood filler. They make stainable wood filler if you’re planning on staining your door but we are painting ours so I just used this Minwax color changing wood filler.

IMG_2356.jpg

sand the entire door

Once that dries, you’ll want to do a good all over sand. I like to start with a 120 grit, then finish with a 220 grit. Make sure to remove any dust before you stain or paint your door. We will be painting ours later this week and installing it over the weekend! (ekkkkkk, can’t wait!!!) So be sure to check back next week to see the finished product.

ORC-Guest-400x218.png

Have you been following along with any other One Room Challenge participants??? I’m blown away each week by all the talented men and women! Be sure to stop by the ORC blog page to take a look.

xo-Lindsey

In DIY, Our Home Tags bedroom, slider door, barn door, diy door, sneak peek
← Laid Back Friendsgiving TablescapeONE ROOM CHALLENGE: WEEK 3 (FURNITURE ARRIVED & A LITTLE DIY PROJECT) →

hey there!

I'm Lindsey

I'm so glad you found me! Take a look around, enjoy yourself and don't forget to say hi!


categories

D E S I G N
D I Y   P R O J E C T S
D E C O R
O U R   H O M E
M I S C.


follow along

❤️Black Lives Matter ❤️#blackouttuesday
Having so much fun designing a classic bar for this lovely Leawood home. ❤️ The client loves blue/turquoise and this is how I incorporate color without being over the top. 
Do you struggle with using color in your home? 🤔 Remember try to use color i
Is anyone else getting tired of hauling plants in and out of the house because this weather can’t make up its mind?! 🤪 I have two trays of veggies just waiting to be planted...please send warmer weather. 😊 🙏
“A mother is she who can take the place of all others but whose place no one else can take.” -Cardinal Mermillod
So fresh and so clean!  When we were choosing our cabinet color for this home I knew I wanted the perfect putty/greige.  I think Northern Cliffs by Benjamin Moore hit the nail on the head.  It’s warm and cozy yet still light enough to make the
I’m alive!  Just emerging from my holiday haze. 😊 We had such a good break and it was just what our family needed.  Hope you all are feeling recharged and ready to take on 2020. ❤️ sharing our before and after view of our dining/living room.

subscribe

Enter your email address to subscribe to this blog and receive notifications of new posts by email.

Thank you!

pinterest


subscribe for your free guide!

Sign up for our monthly newsletter and you'll get our FREE Home Styling Made Easy guide!

Thank you! Check your email to confirm your subscription and receive your FREE guide!


❤️Black Lives Matter ❤️#blackouttuesday
Having so much fun designing a classic bar for this lovely Leawood home. ❤️ The client loves blue/turquoise and this is how I incorporate color without being over the top. 
Do you struggle with using color in your home? 🤔 Remember try to use color i
Is anyone else getting tired of hauling plants in and out of the house because this weather can’t make up its mind?! 🤪 I have two trays of veggies just waiting to be planted...please send warmer weather. 😊 🙏
“A mother is she who can take the place of all others but whose place no one else can take.” -Cardinal Mermillod
So fresh and so clean!  When we were choosing our cabinet color for this home I knew I wanted the perfect putty/greige.  I think Northern Cliffs by Benjamin Moore hit the nail on the head.  It’s warm and cozy yet still light enough to make the
I’m alive!  Just emerging from my holiday haze. 😊 We had such a good break and it was just what our family needed.  Hope you all are feeling recharged and ready to take on 2020. ❤️ sharing our before and after view of our dining/living room.

For your “Daily Decor Fix” follow @reviveanddesign


say hello

reviveanddesigninteriors@gmail.com


find us

Interior Design Studio in Kansas City


Copyright Revive & Design 2017 • Website designed by 23&9 Creative